
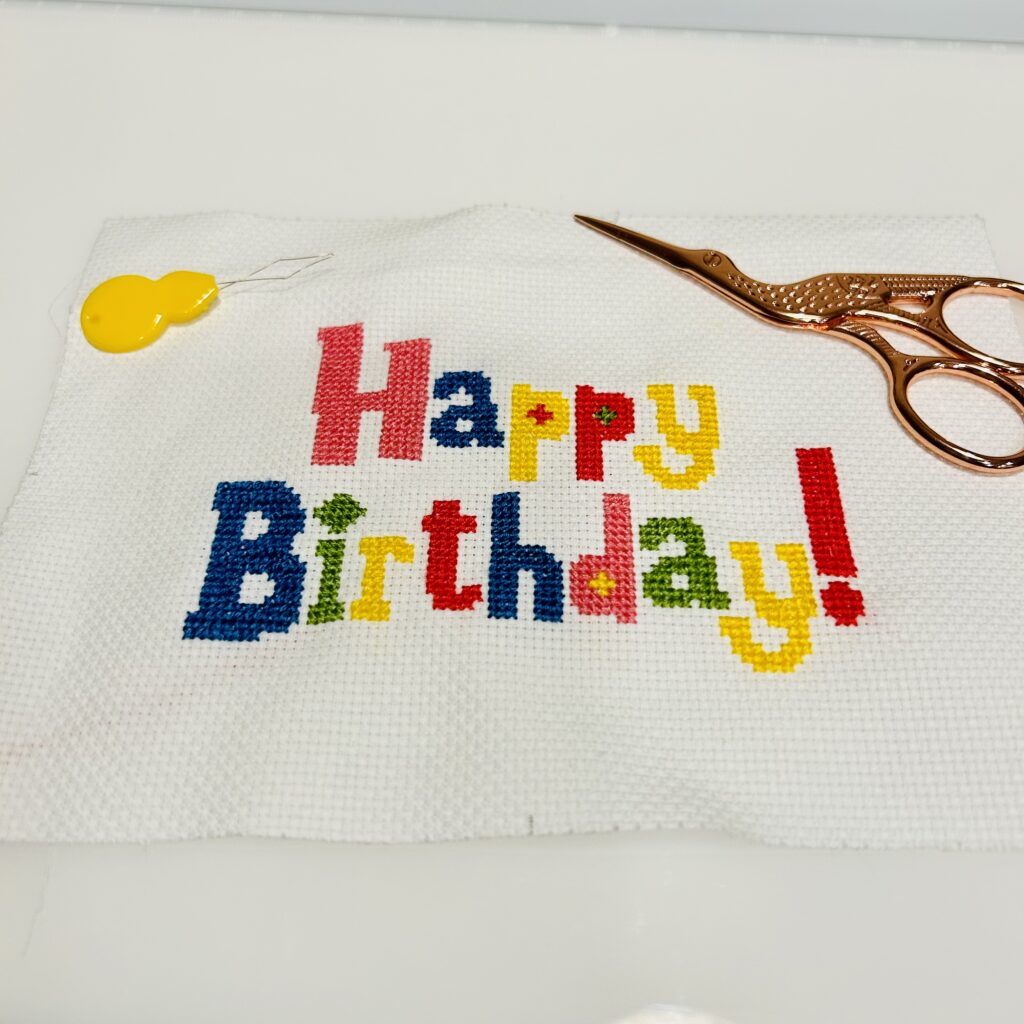
This week I was working on something rather new: a cross-stitched birthday card for an upcoming birthday of a family member! It was quite a fun thing! The finished work would be in the landscape orientation (instead of portrait).
Materials
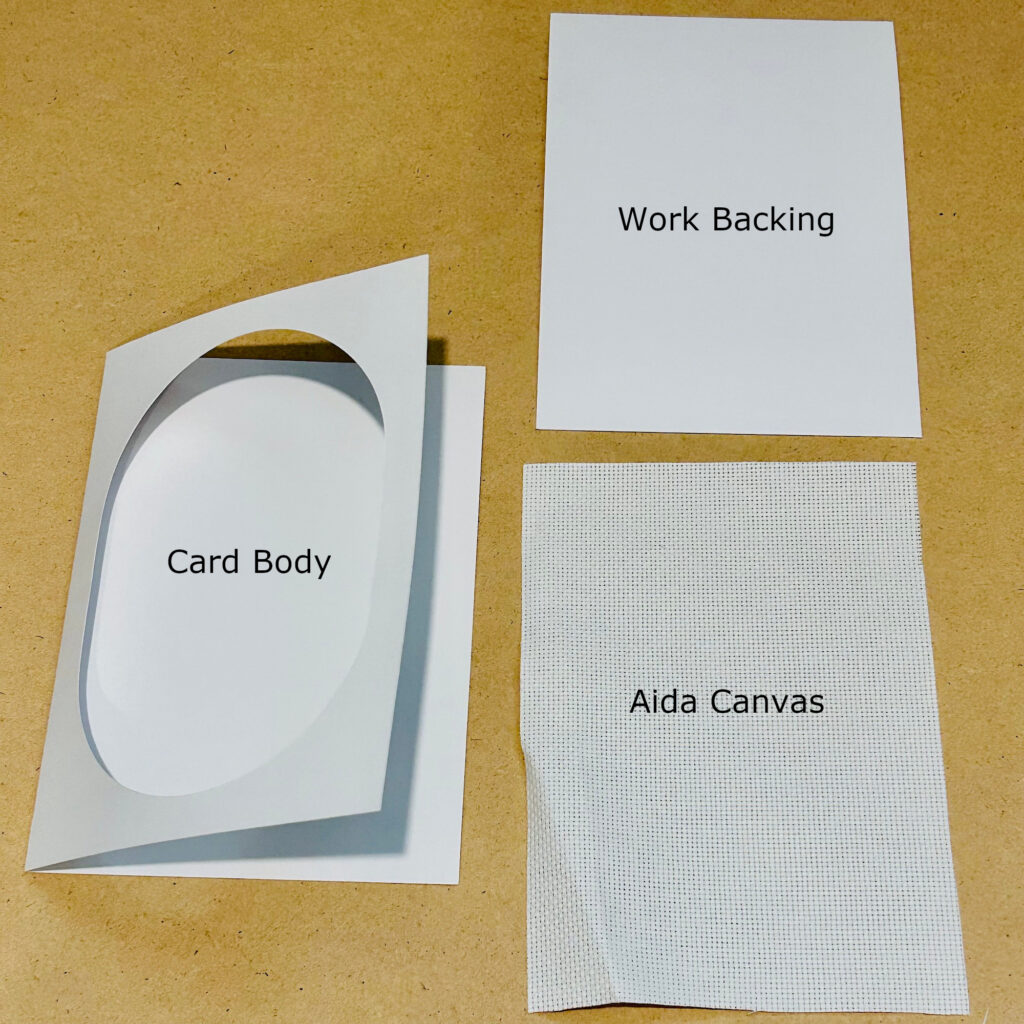
Card body
This is a Letter sized (8.5″ x 11″) card stock that I cut to 7″ x 10″ and fold in the middle length-wise. I used a my Cricut to cut out a hole in the middle of one side to showcase the cross-stitch. You can use a regular cutter to make the hole. I left about 0.5″ width frame around the hole.
Work Backing
This piece is made of another card stock, cut out to roughly 5″ x 7″. It covers the back of my cross-stitch work. I then made sure that I could fold the card properly with this piece inside, some trimming might be needed.
Aida canvas
I cut the canvas to the same size as that the Work Backing above. Similarly, I made sure that I could fold the card properly with the Work Backing and the Aida Canvas in it. Some light trimming on the Aida canvas might be needed later. I did this after I finished my work just to make sure I won’t over-trim.
Pattern and Floss
Pattern is my own, and you can find it here. If you’d like to do this project, you can use different colors than what’s in the pattern, you’d just need 5 different kinds.
Envelope
Self explanatory, I’d just get one at office supply store or Amazon. I made sure that it’d fit the 5″x 7″ card.
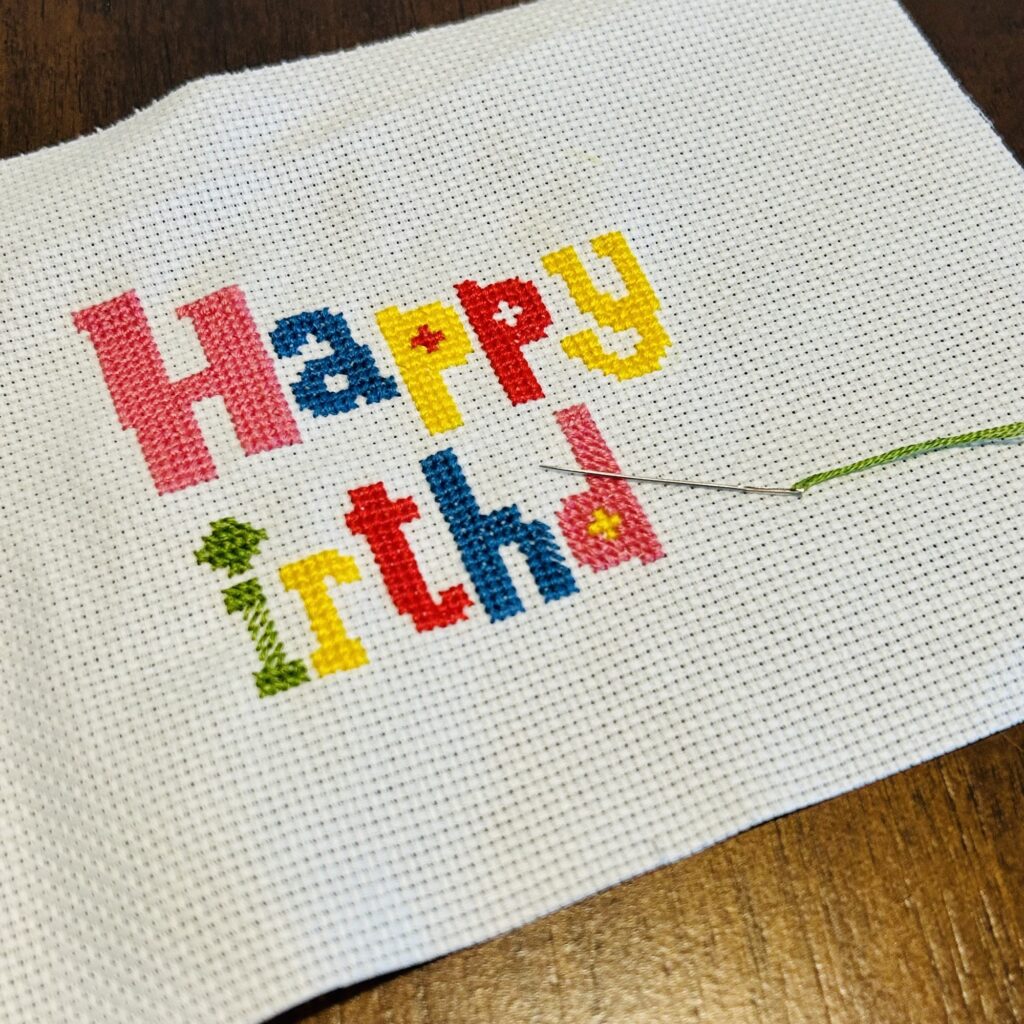
Starting the Work
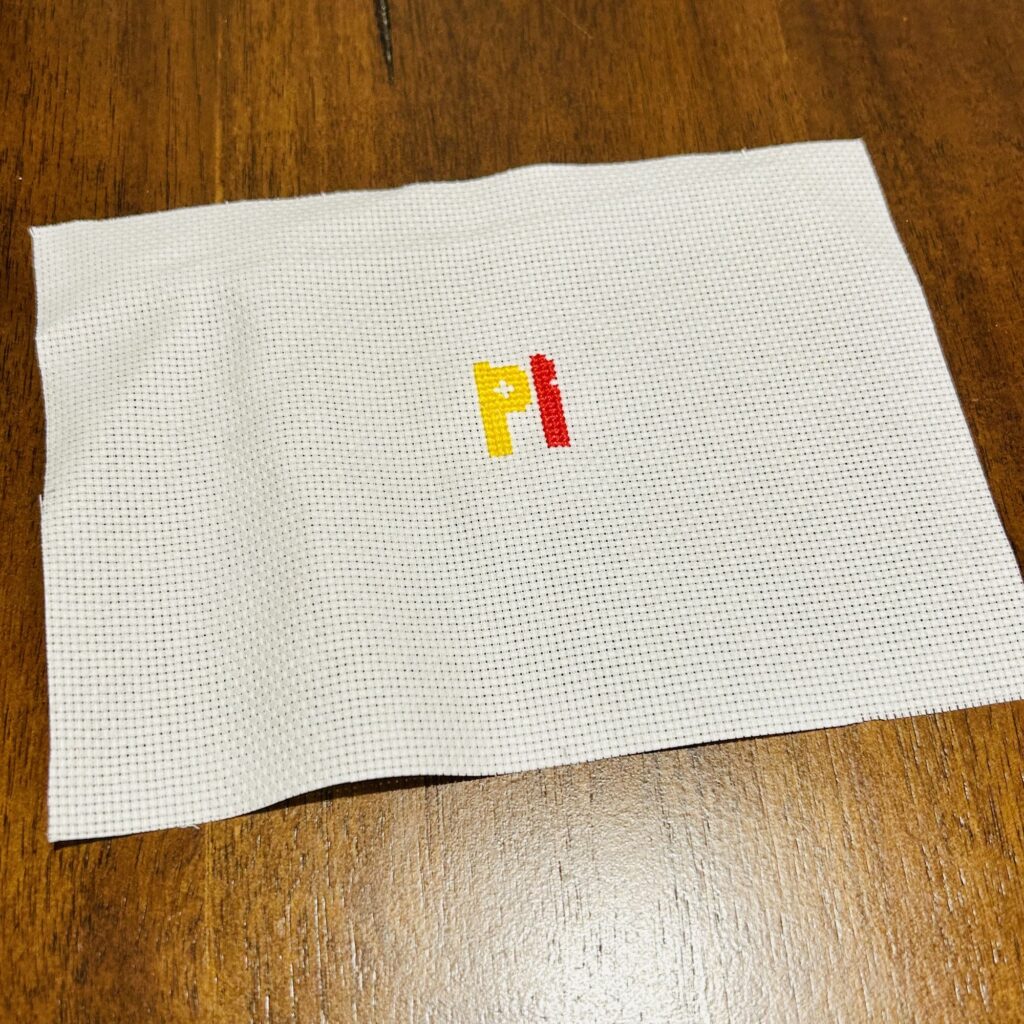
As the middle of the work is the bottom tail of the first “p” in the word “Happy”, I marked this location first on the Aida Canvas and started stitching that letter.
Finishing Up
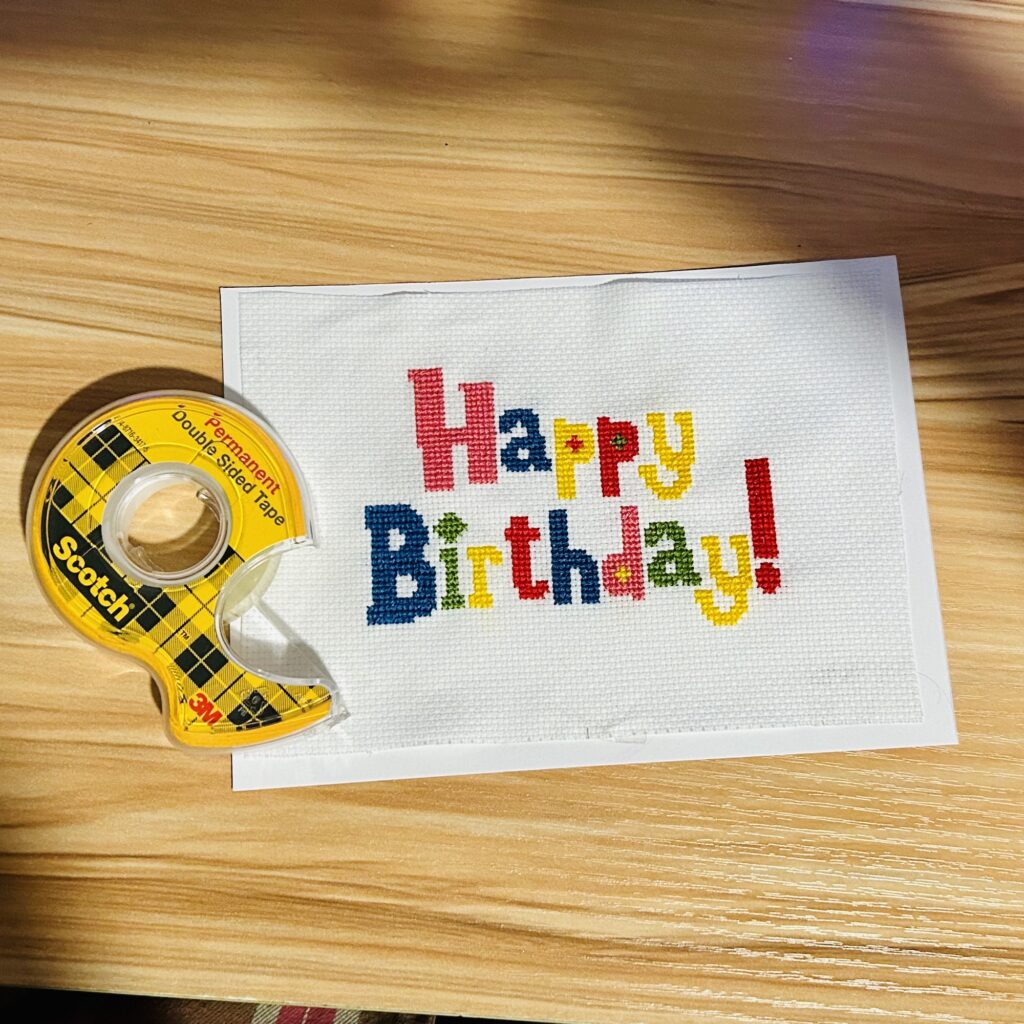
When the work is finished, I used this double sided tape from Scotch to assemble the card together. I first tape the Aida to the Work Backing, then the Work Backing to the Card Body.